Cover Letter with Style - Part One
- Stefano
- Typesetting
- 15 Mar, 2020
Introduction
I decided to start a new tutorial, this time illustrating a way to obtain a stylish cover letter with XeLaTeX, which enables the easy use of OpenType fonts (through the fontspec package) and supports for Unicode text (no need of escape extended characters anymore). Also, KOMA-Script will be used.
The cover letter is the first thing they will read; possibly, its form is as important as its content. Even if you disagree, a fancy letter doesn’t do any harm, doesn’t it? For example, what about a letter like this:
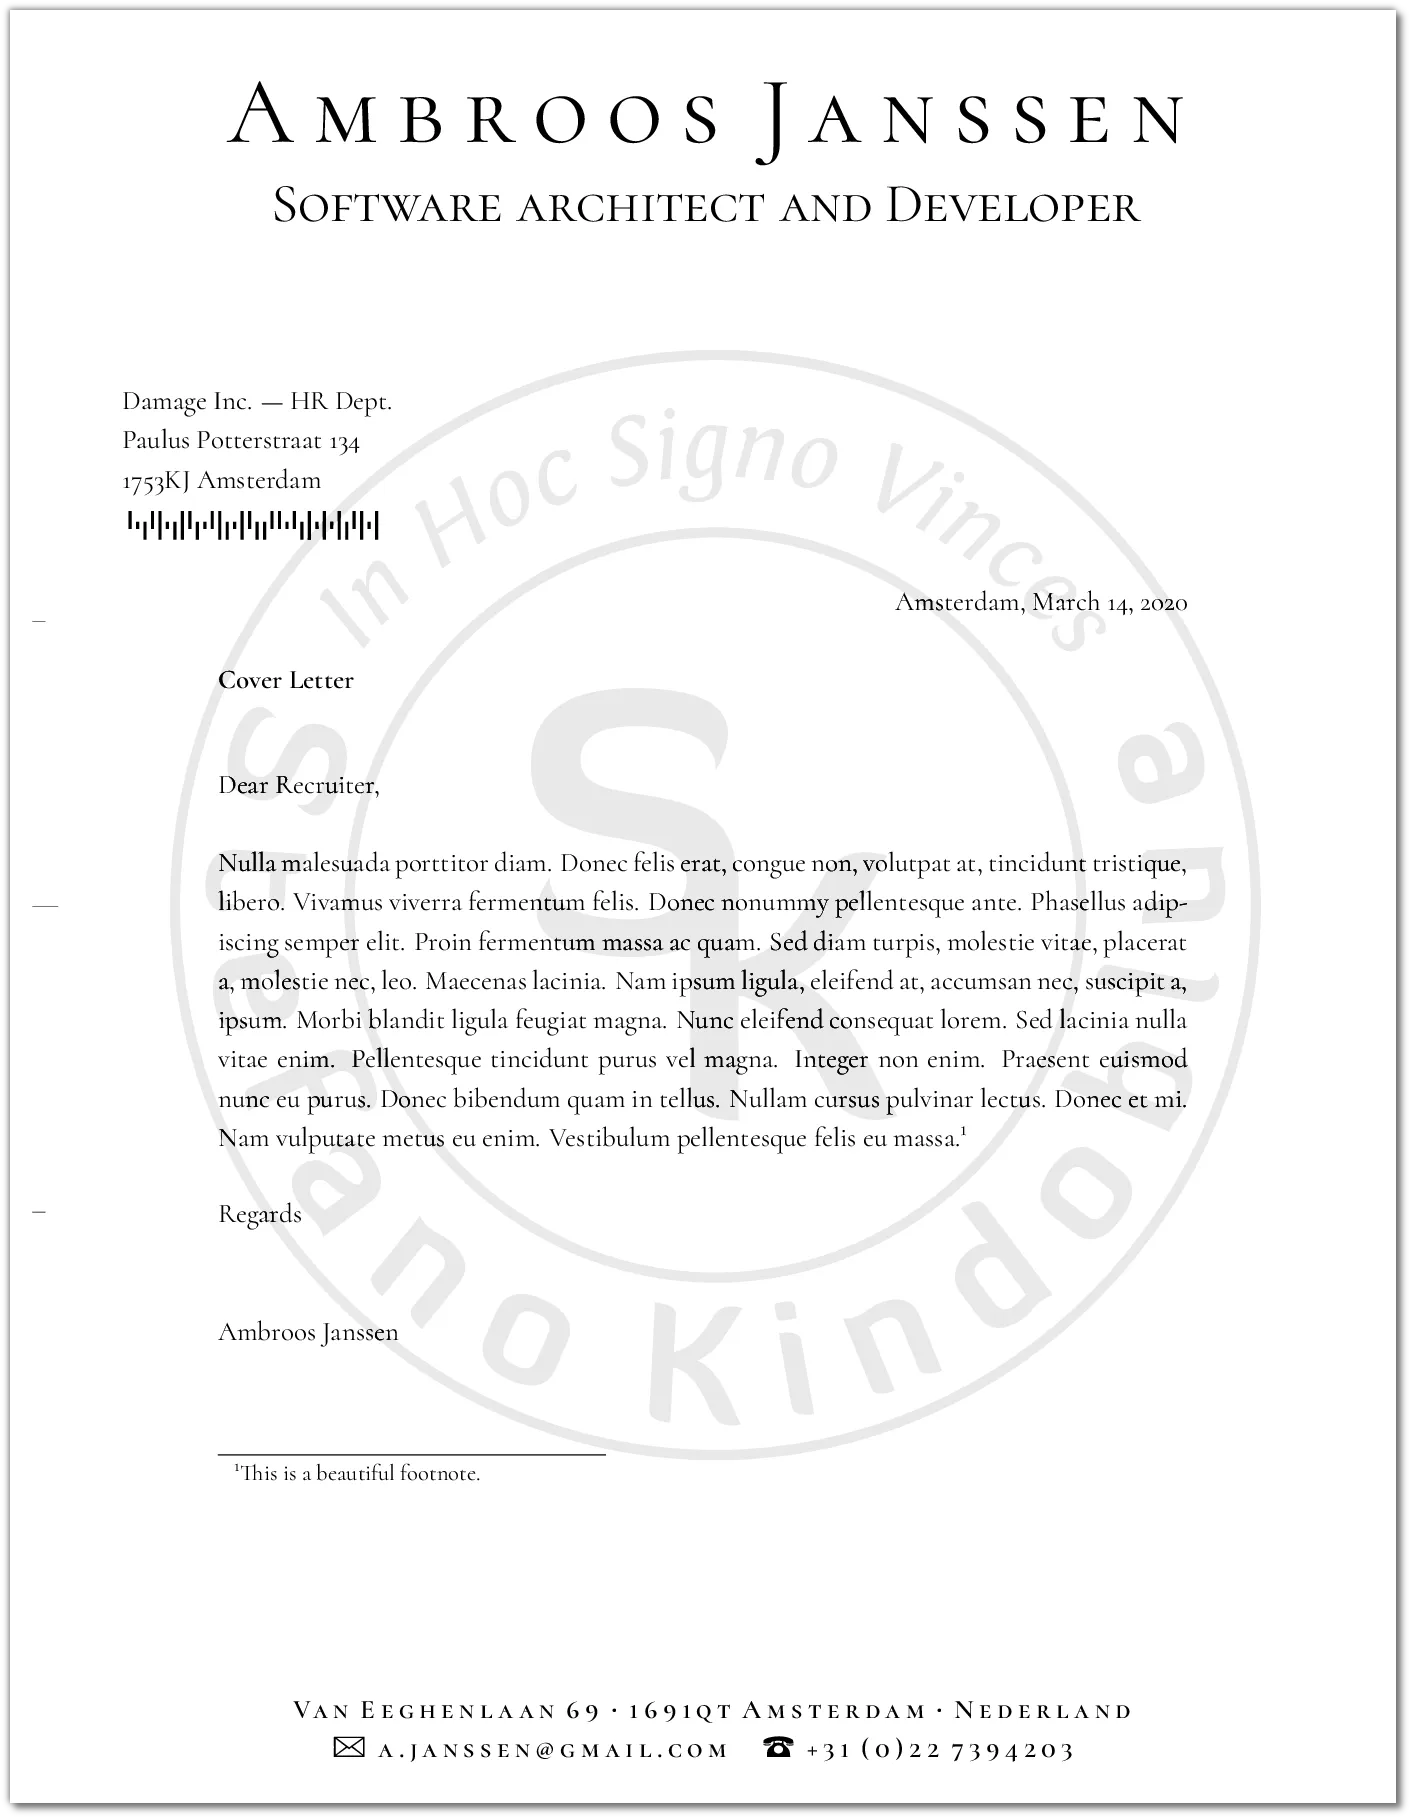
Strong header, contact data in the footer, logo as watermark. Even a barcode to pimp the destination address! Ok, the watermark and the barcode are a little too nerdy, but it will give me the chance to show how easy is to use PSTricks from inside XeLaTex.
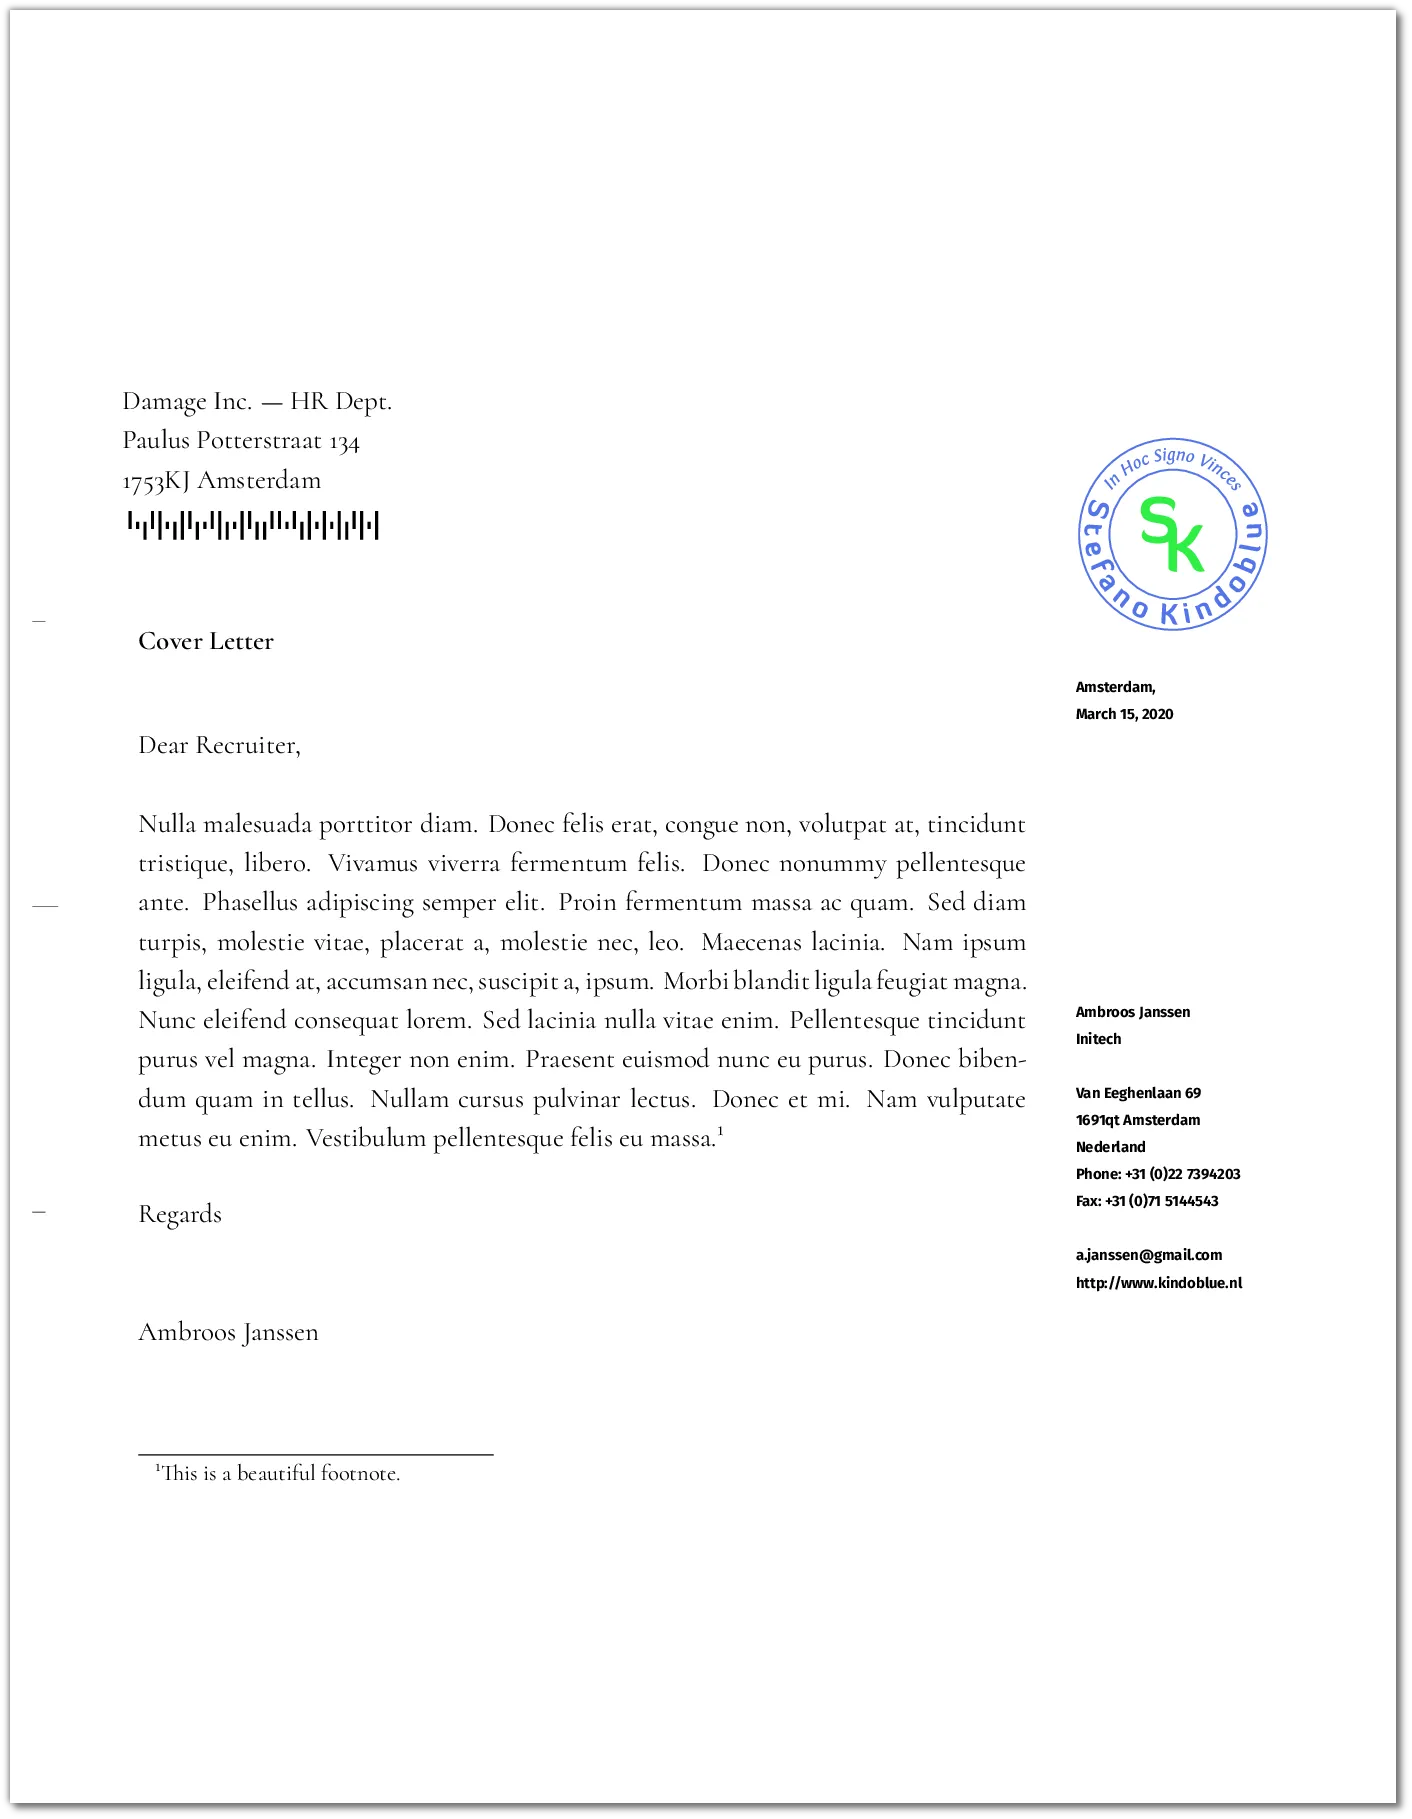
In this tutorial, I will also show how to separate the content from the style, so you can swap the latter easily, to obtain something completely different, like this, for example:
First draft
I assume you dutifully installed XeLaTeX and KOMA-Script. Now create a .tex file and write a skeleton of the cover letter like this:
1\documentclass[letterpaper,pagesize,UScommercial9]{scrlttr2}2
3\usepackage[english]{babel}4\usepackage{lipsum}5
6\begin{document}7
8\begin{letter}{%9       Damage Inc. --- HR Dept.\\10       Paulus Potterstraat 134\\11       1753KJ Amsterdam12}13\setkomavar{subject}{Cover Letter}14\opening{Dear Recruiter,}15
16\lipsum[2]17
18\closing{Regards}19
20
21\end{letter}22\end{document}
At line 1, you instruct XeLaTeX to load the letter class from KOMA-Script (by using scrlttr2) and specifying which paper size to use (letterpaper in this case). The option pagesize forces the page size of the resulting pdf file to follow accordingly. Without this option, headaches will ensue: you will see the main matter (the text) to be forced into the specified page size, but the page itself not be changed at all. By default, KOMA-Script uses the DIN standards (which also mandate the paper size to be A4) For US, you can use the option UScommercial9.
Even if not stated explicitly, KOMA-Script needs the package babel to be included, and so we do at line 3. At line 8, we start the letter; at lines 9, 10, 11 the destination address is specified. In line 16, the letter’s body, in this case one paragraph from lorem ipsum. The other parts should be trivial to understand. Basically, this is a template for any kind of letter you will write. Nothing difficult, indeed. If you process this with XeLaTeX, you will obtain:
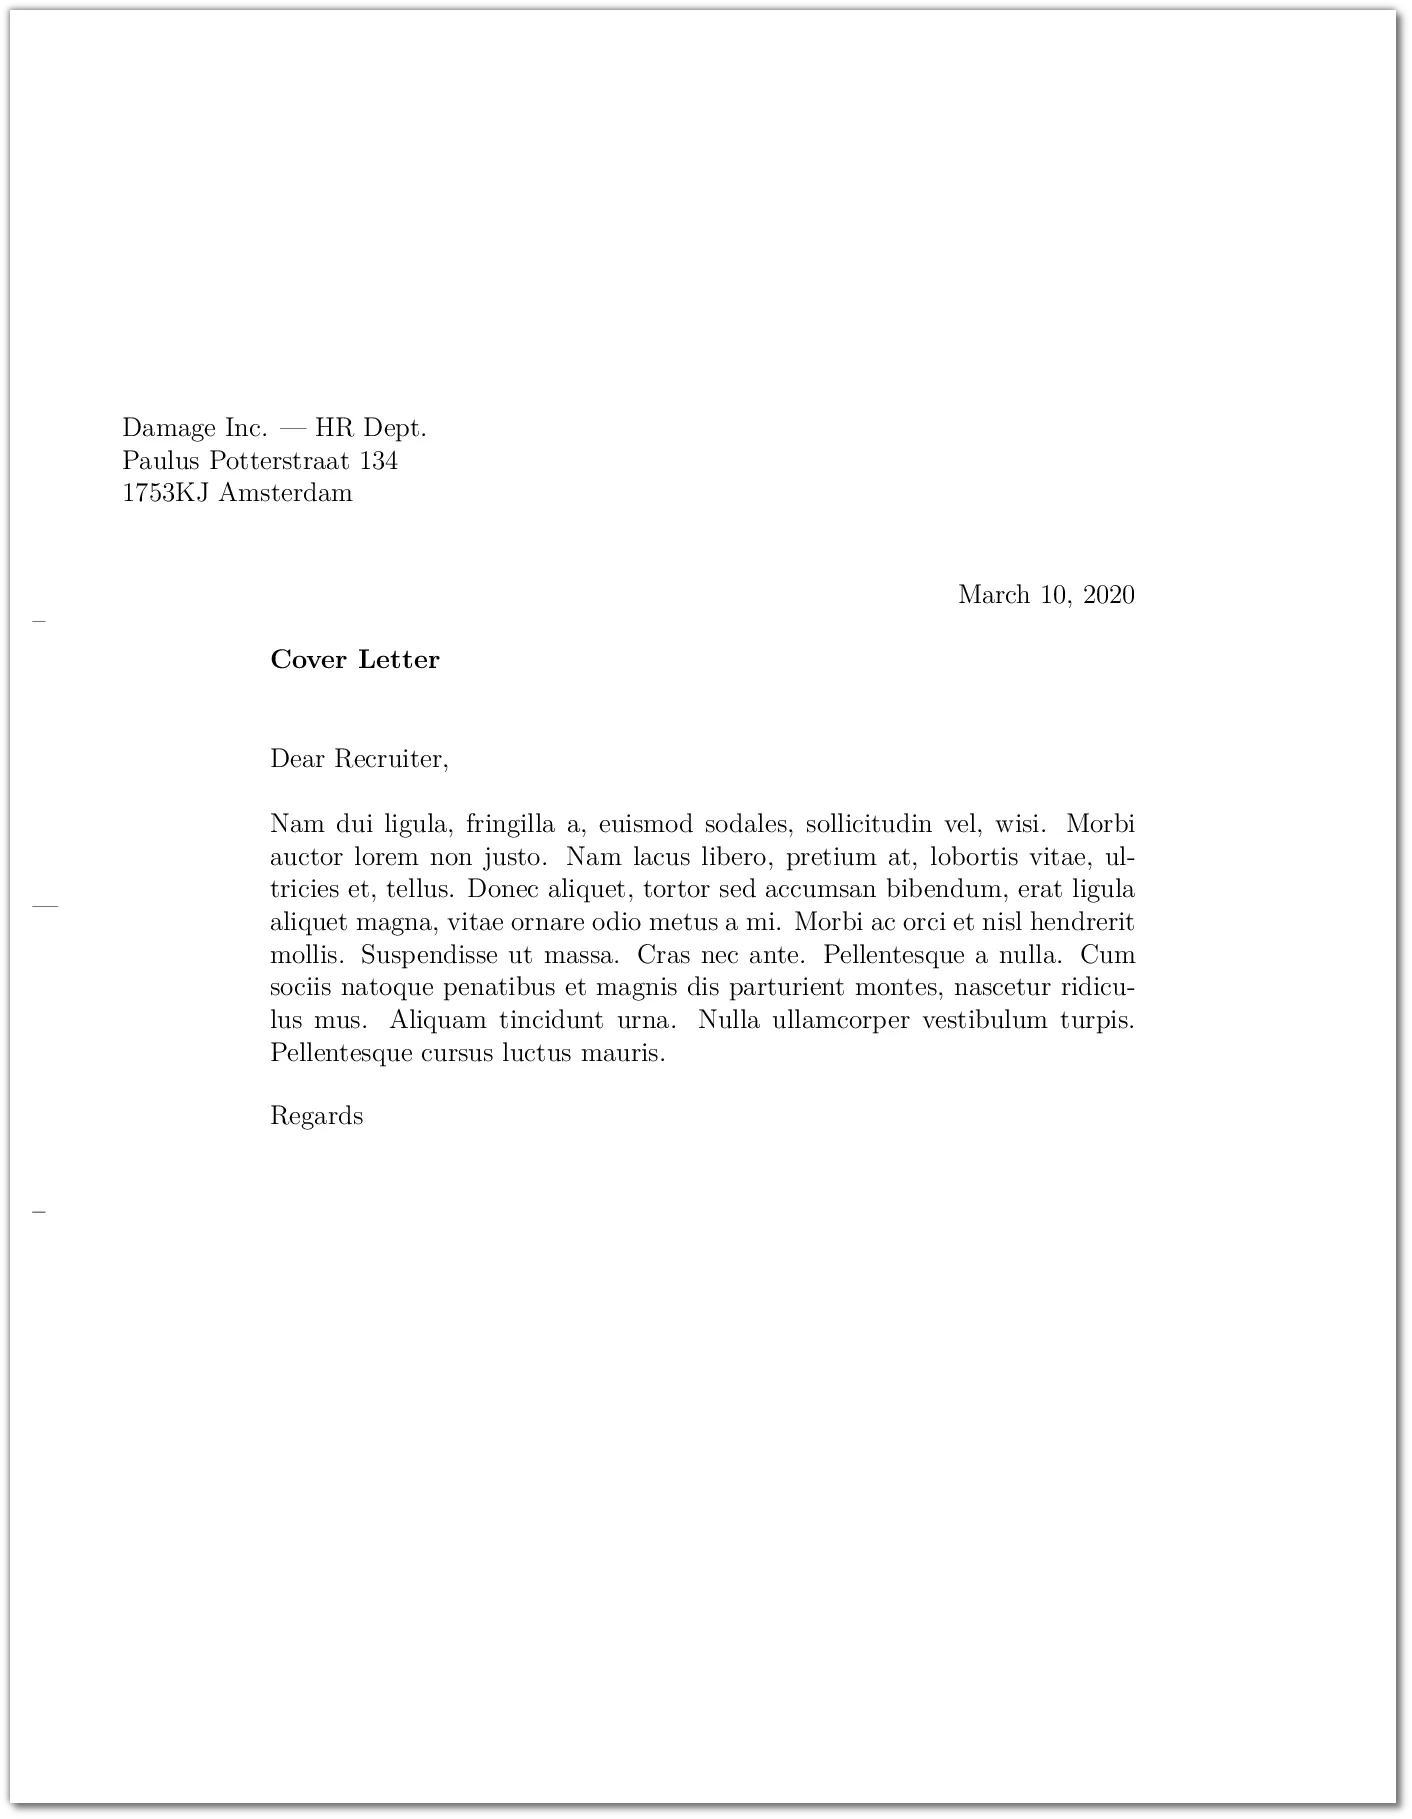
Effortlessly we obtained a nice formatted letter. KOMA-Script have even added three dashes on the left border: they are guides to fold the letter with precision.
Separating content from style
The only thing missing is the sender’s address. I could have added the KOMA instructions to set the sender address into the tex file directly, but there’s a better method. The letter document class defined by KOMA-Script supports the loading of a setting/style file. In this file, with extension .lco, you can store things like your data (used to compose the sender address) or other latex instructions. In this way, the .tex will contain just the letter text and nothing else. This is handy for two reasons:
- you don’t have to type your contact data for each letter you write;
- you may have more
.lcofiles that you can use to change the look & feel altogether.
So, create a file and call it standard.lco. Stick your data in it, like this:
1\ProvidesFile{standard.lco}[%2  2002/07/09 v0.9a LaTeX2e unsupported letter-class-option]3
4\usepackage[english]{babel}5
6% ==============================================7%  PERSONAL DATA8% ==============================================9\setkomavar{fromname}{Ambroos Janssen}10\setkomavar{fromaddress}{Van Eeghenlaan 69\\1691qt Amsterdam\\Nederland}11\setkomavar{fromphone}{+31 (0)22 7394203}12\setkomavar{fromemail}{a.janssen@gmail.com}13\setkomavar{fromfax}{+31 (0)71 5144543}14\setkomavar{fromurl}{http://www.kindoblue.nl}15\setkomavar{frombank}{Postbank 9307157}16\setkomavar{place}{Amsterdam}17\setkomavar{signature}{Ambroos Janssen}18
19\endinput
Change accordingly your .tex file (containing the text of the letter) to instruct KOMA-Script to load the standard.lco file:
1\documentclass[standard,letterpaper,pagesize,UScommercial9]{scrlttr2}2
3\usepackage{lipsum}4
5\begin{document}6
7\begin{letter}{%8       Damage Inc. --- HR Dept.\\%9       Paulus Potterstraat 134\\%10       1753KJ Amsterdam11}12\setkomavar{subject}{Cover Letter}13\opening{Dear Recruiter,}14
15\lipsum[2]16
17\closing{Regards}18
19
20\end{letter}21\end{document}
I’ve changed the first line, adding the standard option. This will load the standard.lco, in which I also moved the instruction to load the babel package. Urge yourself to run XeLaTeX to see the results:

The sender’s address now appears where it is supposed to be. If you are using the default DIN standard (leave out UScommercial9 and replace letterpaper with a4paper), you will also get the one-liner version of the sender address, meant to pop up from the transparent window of the envelope - if any - together with the destination address.
Well, that’s all for the first part. There’s still a lot to explain so please proceed to the second part.