Cover Letter with Style - Part Five
- Stefano
- Typesetting
- 25 Apr, 2020
This is the fifth and final part of the tutorial Cover letter with style. You can find the fourth part here.
The logo as watermark
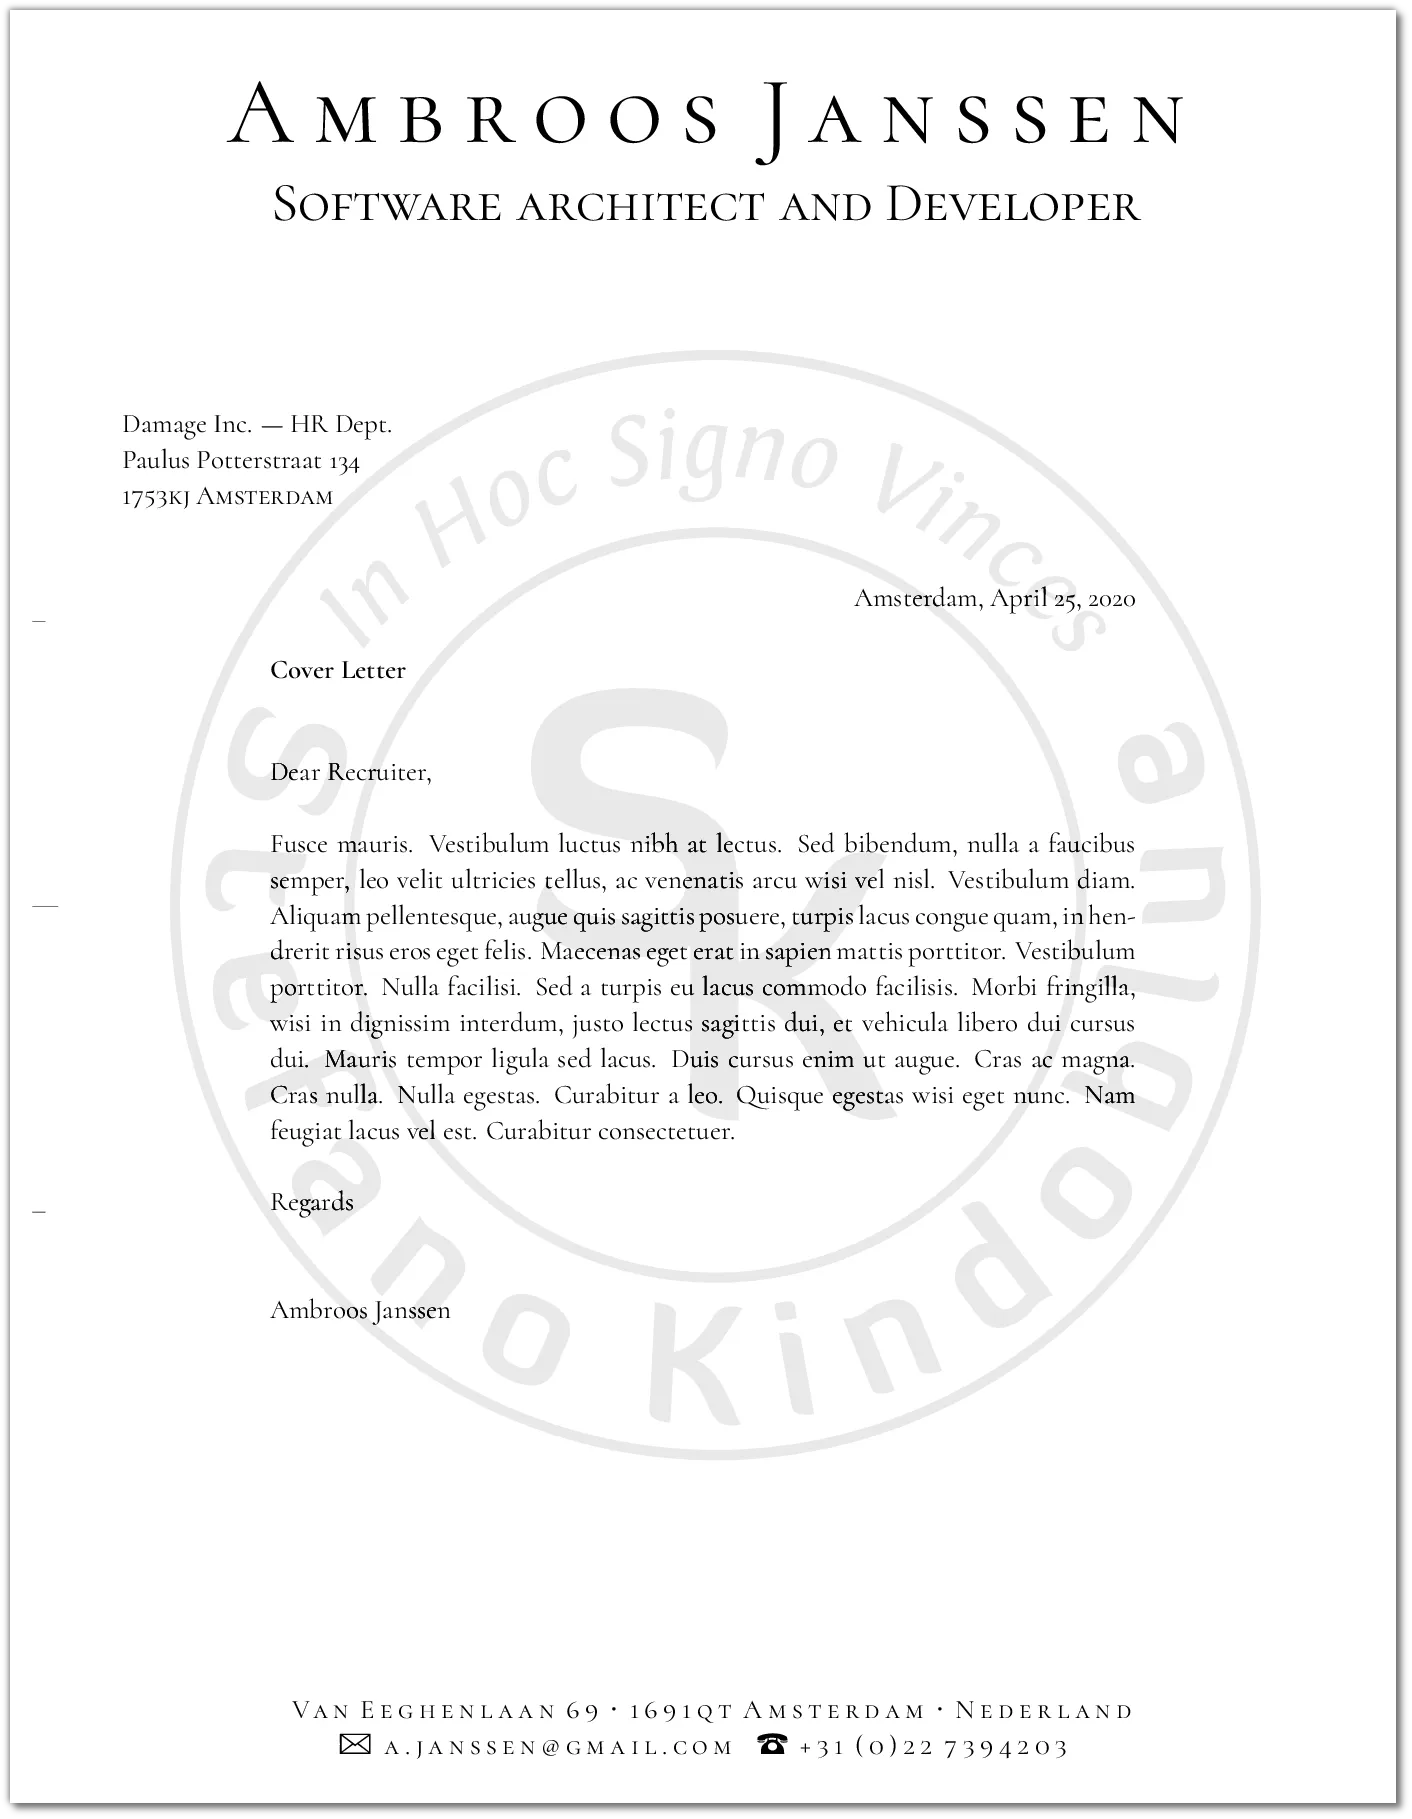
This part will show you how to add your logo as a watermark to your cover letter. I created one using Inkscape (vector graphics software) and then saved as Encapsulated PostScript (EPS) file. To follow along, you can download mine here.
For the purpose, I will use two packages: graphicx and eso-pic. From the first one, I will use the command includegraphics, and from the second one AddToShipoutPicture.
\ProvidesFile{standard.lco}[% 2002/07/09 v0.9a LaTeX2e unsupported letter-class-option]
\usepackage[english]{babel}\usepackage{fontspec}\usepackage{marvosym}\usepackage{graphicx}\usepackage{eso-pic}
% ==============================================% PERSONAL DATA% ==============================================\setkomavar{fromname}{Ambroos Janssen}\setkomavar{fromaddress}{Van Eeghenlaan 69\\1691qt Amsterdam\\Nederland}\setkomavar{fromphone}{+31 (0)22 7394203}\setkomavar{fromemail}{a.janssen@gmail.com}\setkomavar{fromfax}{+31 (0)71 5144543}\setkomavar{fromurl}{http://www.kindoblue.nl}\setkomavar{frombank}{Postbank 9307157}\setkomavar{place}{Amsterdam}\setkomavar{signature}{Ambroos Janssen}
% ==============================================% FORMATTING STUFF% ==============================================
% === font settings\defaultfontfeatures{Mapping=tex-text}\linespread{1.1}\setmainfont {Cormorant}[]\setsansfont [Scale=MatchLowercase]{Fira Sans Book}
\newfontfamily\titlefont{Cormorant SC}[Scale=1.7]\newcommand\mytitle{\titlefont\Huge\addfontfeature{LetterSpace=20.0}\usekomavar{fromname}}\newcommand\subtitle{\titlefont\large{Software architect and Developer}}
\setkomavar{firsthead}{ \centering \begin{tabular}{c} \mytitle\\[5mm] \subtitle \end{tabular}}
\setkomavar{firstfoot}{ \addfontfeature{LetterSpace=20.0}\scshape\centering {\renewcommand{\\}{\ {\Large\textperiodcentered}\ } \usekomavar{fromaddress} }\\ {\Large\Letter} \usekomavar{fromemail} \ {\Large\Telefon} \usekomavar{fromphone}}
\newcommand\BackgroundPicture{ \put(0,0){ \parbox[b][\paperheight]{\paperwidth}{ \vfill \centering\includegraphics[width=0.8\paperwidth,height=0.8\paperheight,keepaspectratio]{sample_logo_transparent.eps} \vfill }}}
\AddToShipoutPicture{\BackgroundPicture}
\endinputOn lines 7 and 8, I imported the packages, and on line 58 I added the background picture, defined by declaring at lines 54-60 the command BackgroundPicture. This command will put a box big as the entire page. Inside the box, the image, centered horizontally (with \centering as usual) and vertically (with a pair of enclosing \vfill)
Finally! Let’s run xelatex and see the result:
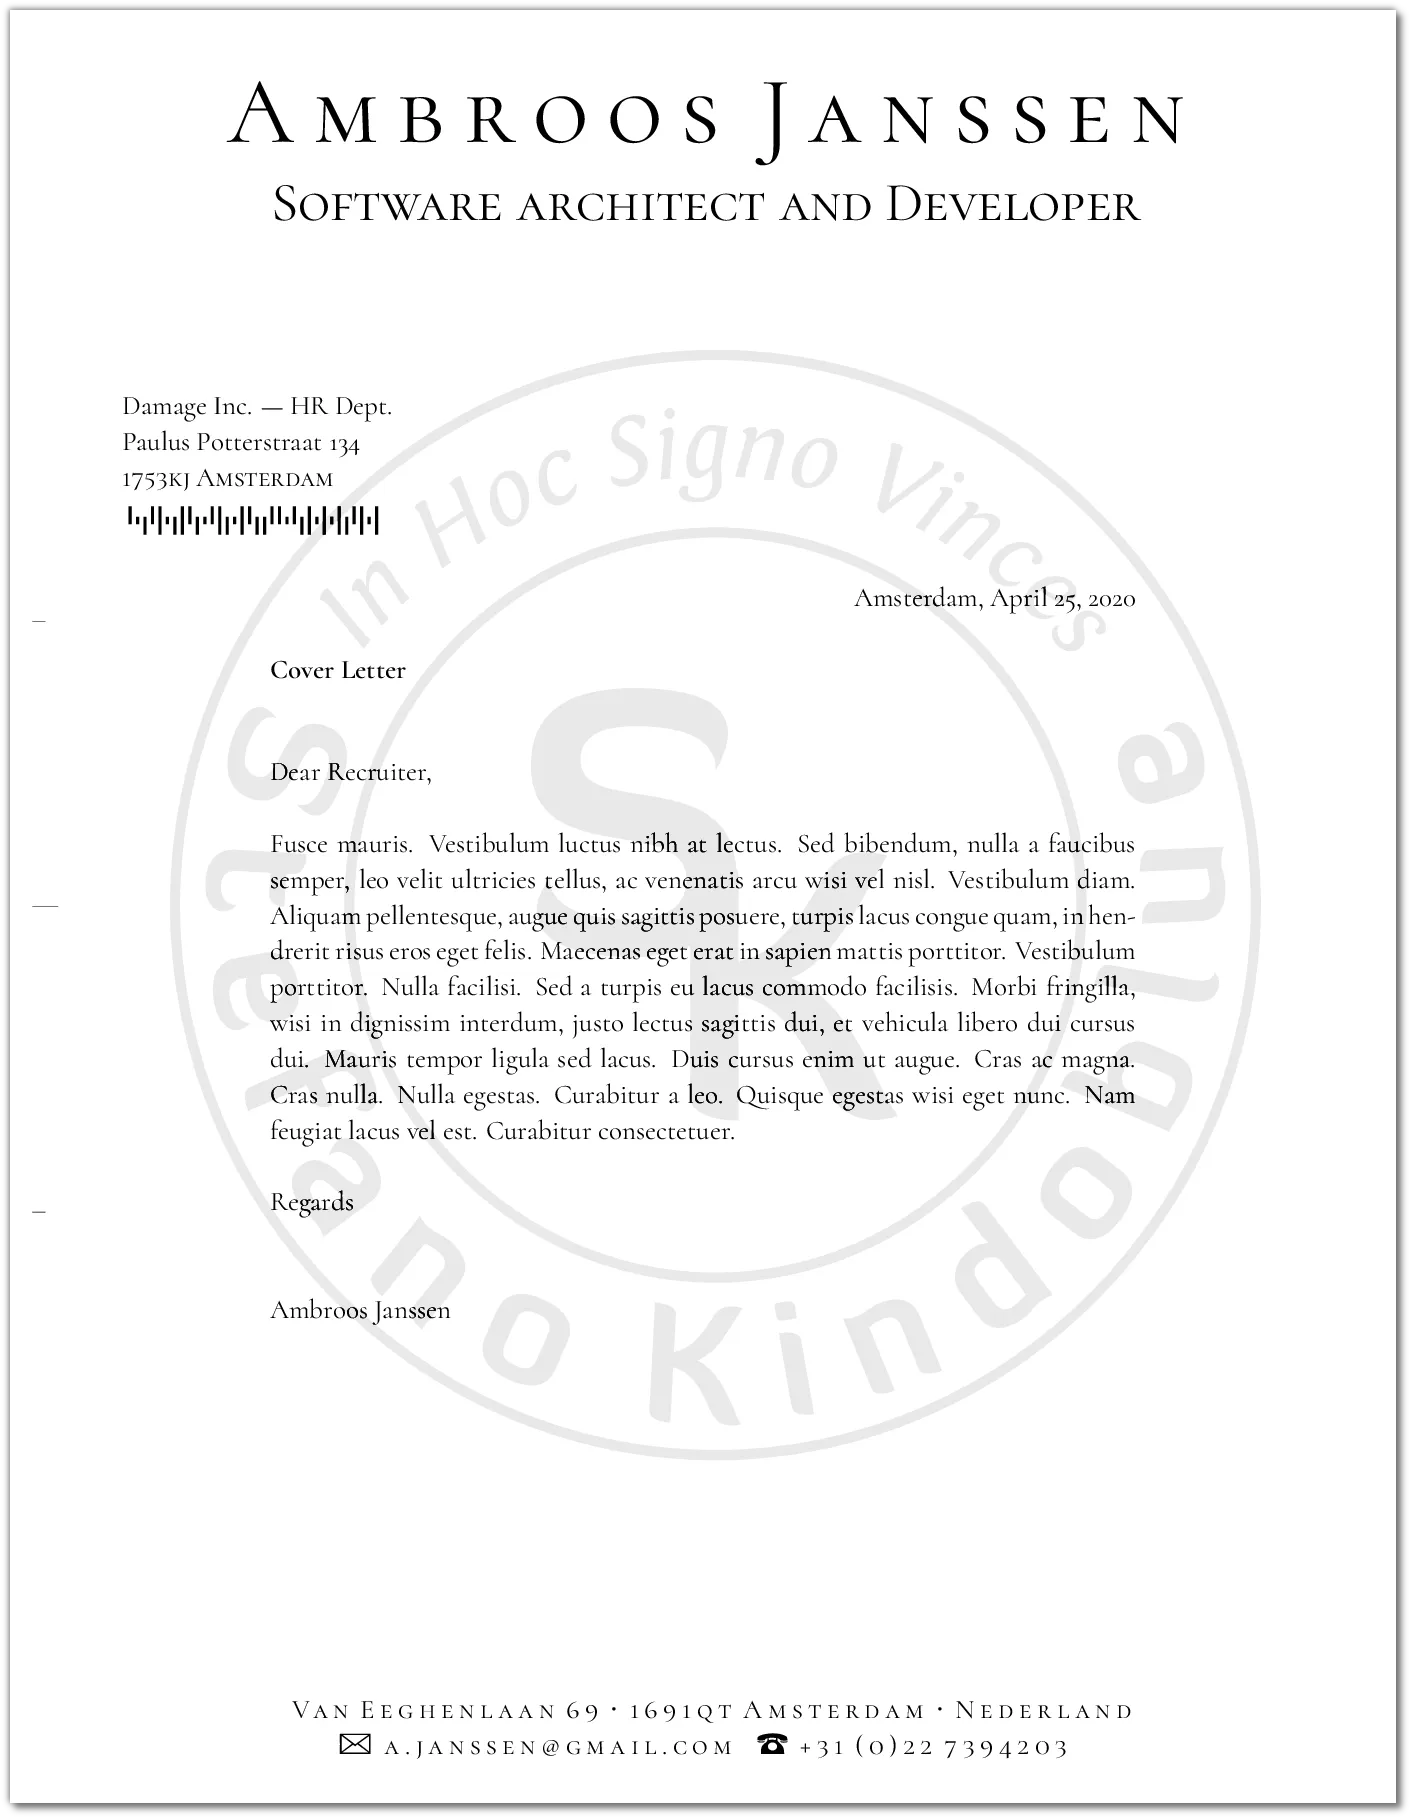
The barcode
In this part, I will show you how to add a barcode to the destination address. It’s nerdy, but it will serve to illustrate how to do graphics with XeLaTex. For the purpose, you will need pstricks.
Installing pstricks is very easy on Ubuntu: open a terminal and issue the command:
sudo apt install texlive-pstricksNow, for drawing a barcode, we can use a pstricks subpackage called pst-barcode. It is pretty easy to use, and its documentation says it all.
This time, instead of changing the template file (standard.lco remember?) I will change the letter itself because the destination address is in there.
So here it is the letter with the barcode added:
\documentclass[standard,letterpaper,pagesize,UScommercial9]{scrlttr2}
\usepackage{lipsum}\usepackage{pst-barcode}
\begin{document}
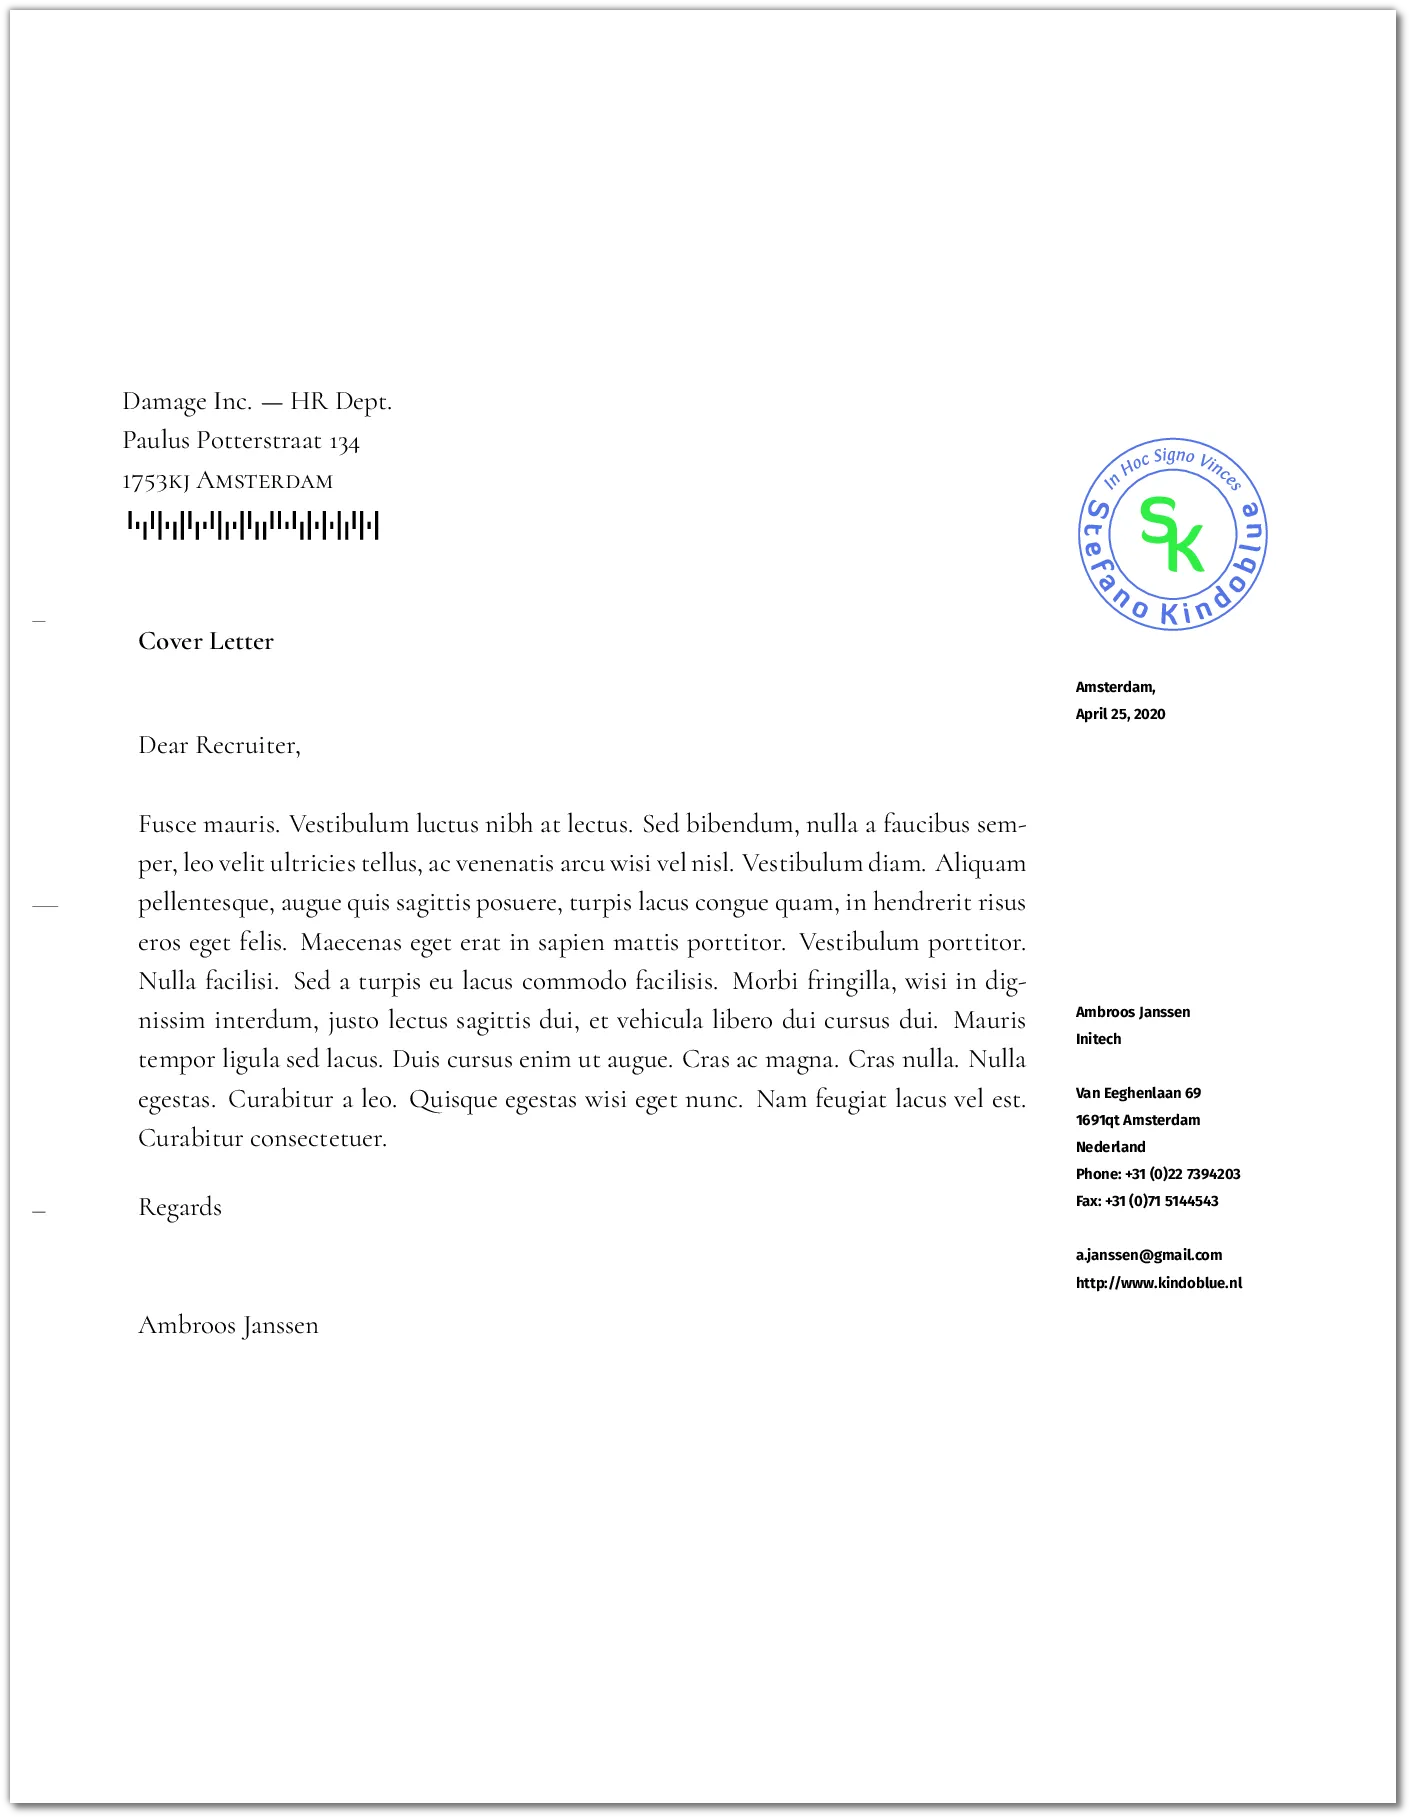
\begin{letter}{% Damage Inc. --- HR Dept.\\ Paulus Potterstraat 134\\ {\scshape 1753kj Amsterdam}\\ \psbarcode[transy=-0.2cm,transx=0.1cm]{1234567}{}{royalmail}}\setkomavar{subject}{Cover Letter}\opening{Dear Recruiter,}
\lipsum[5]
\closing{Regards}
\end{letter}\end{document}On line 4, I import the package, and on line 12 I specify a royal mail barcode, coding in the number 1234567 (just an example). If you typeset the document, you will obtain this:
Alternative template
I am still not done! I have to show one thing more: an alternative template you can use to completely change your cover letter’s look-and-feel. Keeping the template separated from the content permits us to swap style as changing one line only quickly.
First of all, I will provide you a new template. I did not create this template. I just copied from this document: Replacing Latex standard classes with KOMA-Script by Yuri Robbers, Markus Kohm and Rasmus Pank Roulund
Save the above template as alternate.lco file. Now take your cover letter and in the first line specify you want to use this alternative template, like this (‘standard’ replaced with ‘alternate’, at line 1)
\documentclass[alternate,letterpaper,pagesize,UScommercial9]{scrlttr2}
\usepackage{lipsum}\usepackage{pst-barcode}
\begin{document}
\begin{letter}{% Damage Inc. --- HR Dept.\\ Paulus Potterstraat 134\\ {\scshape 1753kj Amsterdam}\\ \psbarcode[transy=-0.2cm,transx=0.1cm]{1234567}{}{royalmail}}\setkomavar{subject}{Cover Letter}\opening{Dear Recruiter,}
\lipsum[5]
\closing{Regards}
\end{letter}\end{document}That’s all. I just changed the first line, instructing KOMA-Script to load the alternate file (no need to specify the .lco extension).
If you typeset the document, your cover letter now will look like this:
Mind that the logo was not the one I used in the previous part: I edited it to have the outlines in more powerful colors (it has to be in the foreground, this time).
A couple of notes:
- if you plan to use more than one template, the personal data section could be put in a separate file and included by the templates;
- the alternate template just shown could not play well with DIN standard, so you might need to fiddle with
infocolwidth
So, I hope you enjoyed the tutorial. See you in seven years.