CLion with multiple CUDA SDKs
- Stefano
- Programming , Data science
- 02 Dec, 2023
There are several ways to set up multiple toolchains with different CUDA versions when using CLion. The easiest way I found was to use micromamba, a lightweight (mini|ana)conda variant, and then use the environment script to configure the toolchains in CLion. The idea is to be able to quickly switch from one sdk to the other, like the following
Micromamba (conda) environments
You can install micromamba by following the instructions here
1ice@kube:~$ "${SHELL}" <(curl -L micro.mamba.pm/install.sh)2  % Total    % Received % Xferd  Average Speed   Time    Time     Time  Current3                                 Dload  Upload   Total   Spent    Left  Speed4  0     0    0     0    0     0      0      0 --:--:-- --:--:-- --:--:--     05100  3069  100  3069    0     0   7525      0 --:--:-- --:--:-- --:--:--  149k6Micromamba binary folder? [~/.local/bin] y7Init shell (bash)? [Y/n] Y8Configure conda-forge? [Y/n] Y9Prefix location? [~/micromamba]10Modifying RC file "/home/ice/.bashrc"11Generating config for root prefix "/home/ice/micromamba"12Setting mamba executable to: "/home/ice/y/micromamba"13Adding (or replacing) the following in your "/home/ice/.bashrc" file14
15# >>> mamba initialize >>>16# !! Contents within this block are managed by 'mamba init' !!17export MAMBA_EXE='/home/ice/y/micromamba';18export MAMBA_ROOT_PREFIX='/home/ice/micromamba';19__mamba_setup="$("$MAMBA_EXE" shell hook --shell bash --root-prefix "$MAMBA_ROOT_PREFIX" 2> /dev/null)"20if [ $? -eq 0 ]; then21    eval "$__mamba_setup"22else23    alias micromamba="$MAMBA_EXE"  # Fallback on help from mamba activate24fi25unset __mamba_setup26# <<< mamba initialize <<<27
28Please restart your shell to activate micromamba or run the following:\n29  source ~/.bashrc (or ~/.zshrc, ~/.xonshrc, ~/.config/fish/config.fish, ...)
Once installed, please take note of the code between
1>>> mamba initialize >>>2....3<<< mamba initialize <<<It will be needed later when we create the environment script for the toolchains. Once you installed micromamba, you can start to install the CUDA sdks, like for example 11.8.0
1# create and activate the env2micromamba create --name cuda-11.8.03micromamba activate cuda-11.8.04
5# install the needed packages for cuda development6micromamba install -c "nvidia/label/cuda-11.8.0" cuda-libraries-dev cuda-nvcc cuda-cudart-static7
8# here I install gcc and g++ using a compatible version9micromamba install gcc=11.4.0 gxx=11.4.0
For 12.3.0 and 12.3.1
1# create and activate the env2micromamba create --name cuda-12.3.03micromamba activate cuda-12.3.04
5# install the needed packages for cuda development6micromamba install -c "nvidia/label/cuda-12.3.0" cuda-libraries-dev cuda-nvcc cuda-cudart-static7
8# install gcc and g++, packages coming from conda-forge9micromamba install gcc=12.3.0 gxx=12.3.010
11# create and activate the env12micromamba create --name cuda-12.3.113micromamba activate cuda-12.3.114
15# install the needed packages for cuda development16micromamba install -c "nvidia/label/cuda-12.3.1" cuda-libraries-dev cuda-nvcc cuda-cudart-static17
18# install gcc and g++, packages coming from conda-forge19micromamba install gcc=12.3.0 gxx=12.3.0
Now you have the environments ready, with all the files installed in ~/micromamba/envs/… and not polluting the systems. So it is easy to get rid of them or update them.
CLion Toolchains
Now we need to create a shell script for each of the conda environments we created, to be used to configure the toolchain in CLion. One script could be called load_cuda_11.8.0.sh with the following content
1# >>> mamba initialize >>>2# !! Contents within this block are managed by 'mamba init' !!3export MAMBA_EXE='/home/ice/y/micromamba';4export MAMBA_ROOT_PREFIX='/home/ice/micromamba';5__mamba_setup="$("$MAMBA_EXE" shell hook --shell bash --root-prefix "$MAMBA_ROOT_PREFIX" 2> /dev/null)"6if [ $? -eq 0 ]; then7 eval "$__mamba_setup"8else9 alias micromamba="$MAMBA_EXE" # Fallback on help from mamba activate10fi11unset __mamba_setup12# <<< mamba initialize <<<13
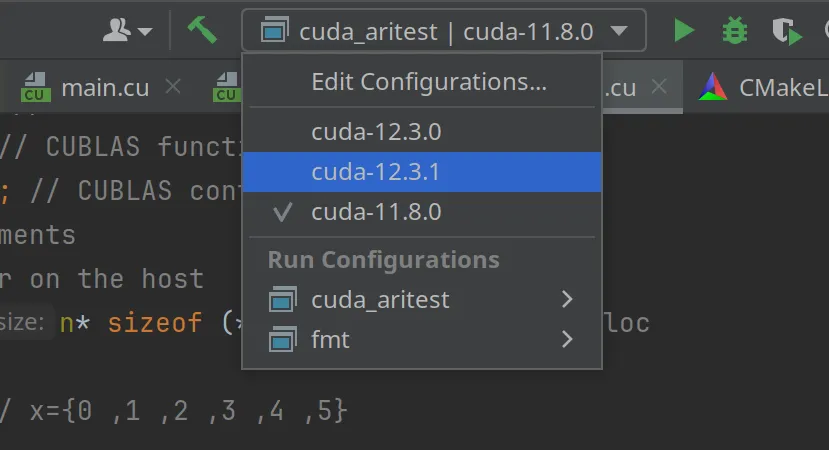
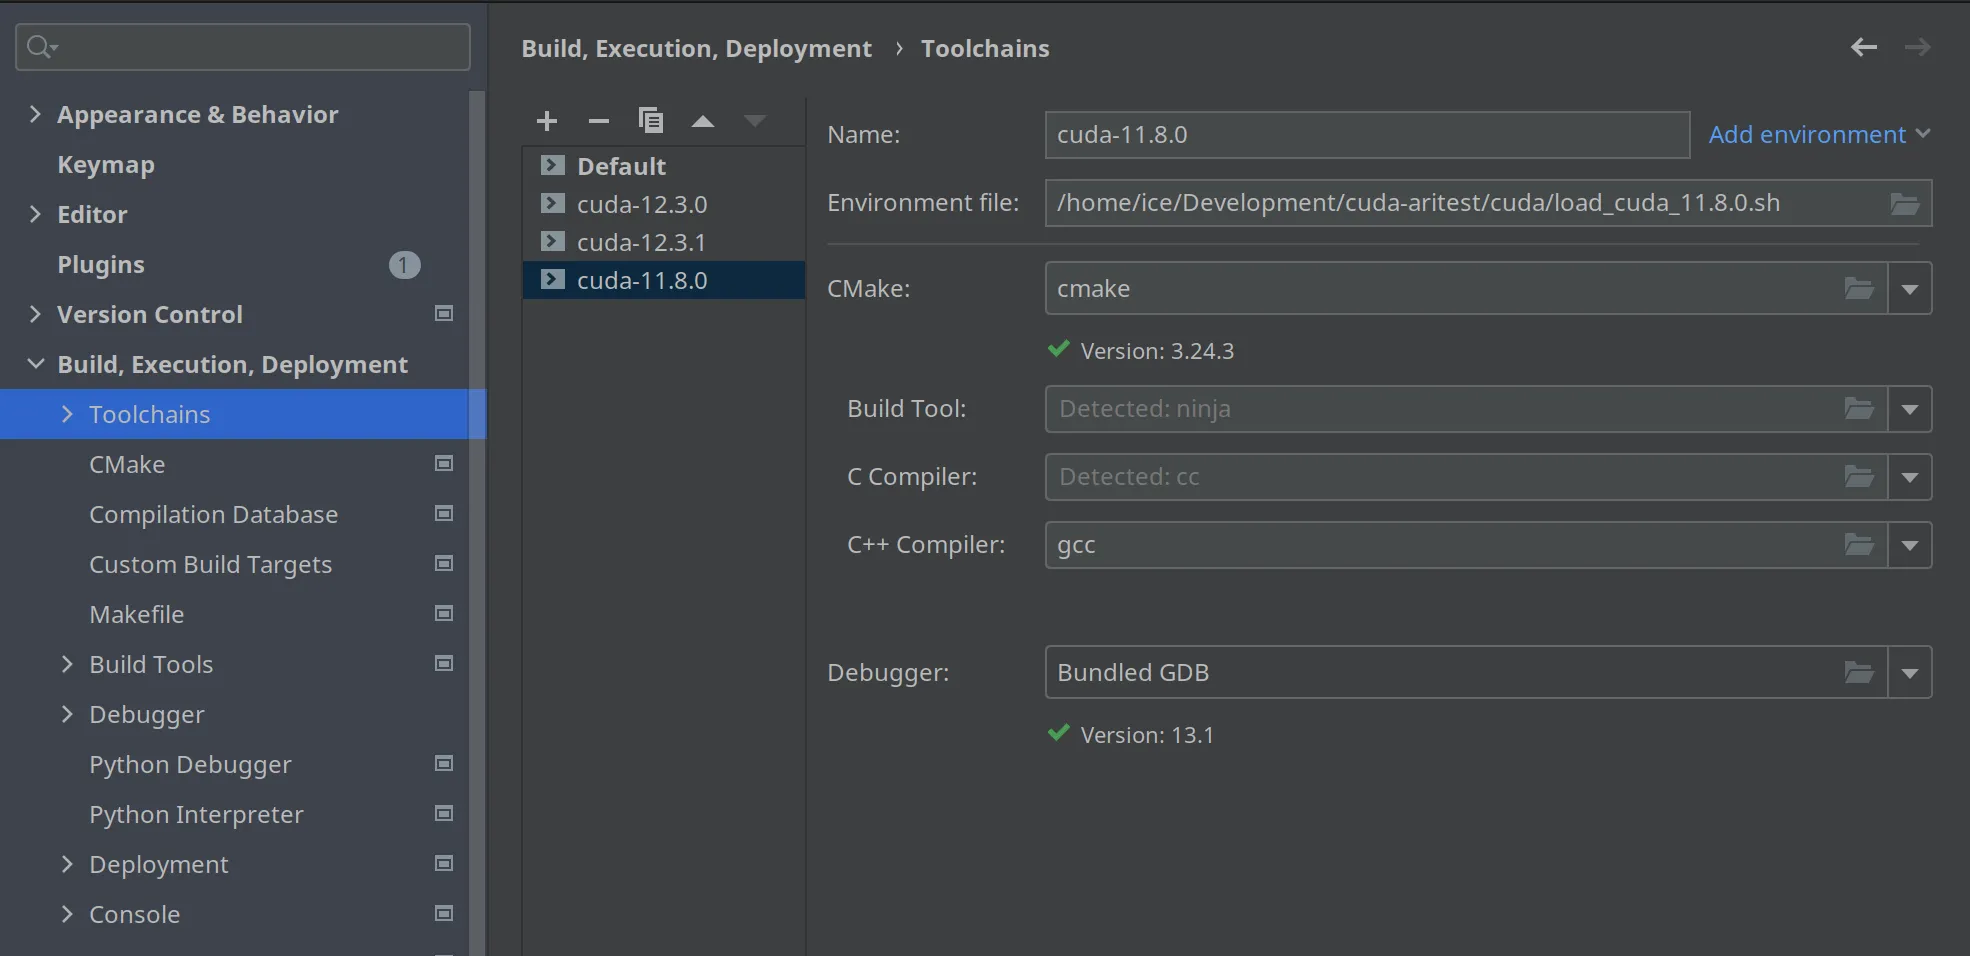
14micromamba activate cuda-11.8.0Now we can add a toolchain in CLion, by using the above script as an environment file. Here I show my toolchains
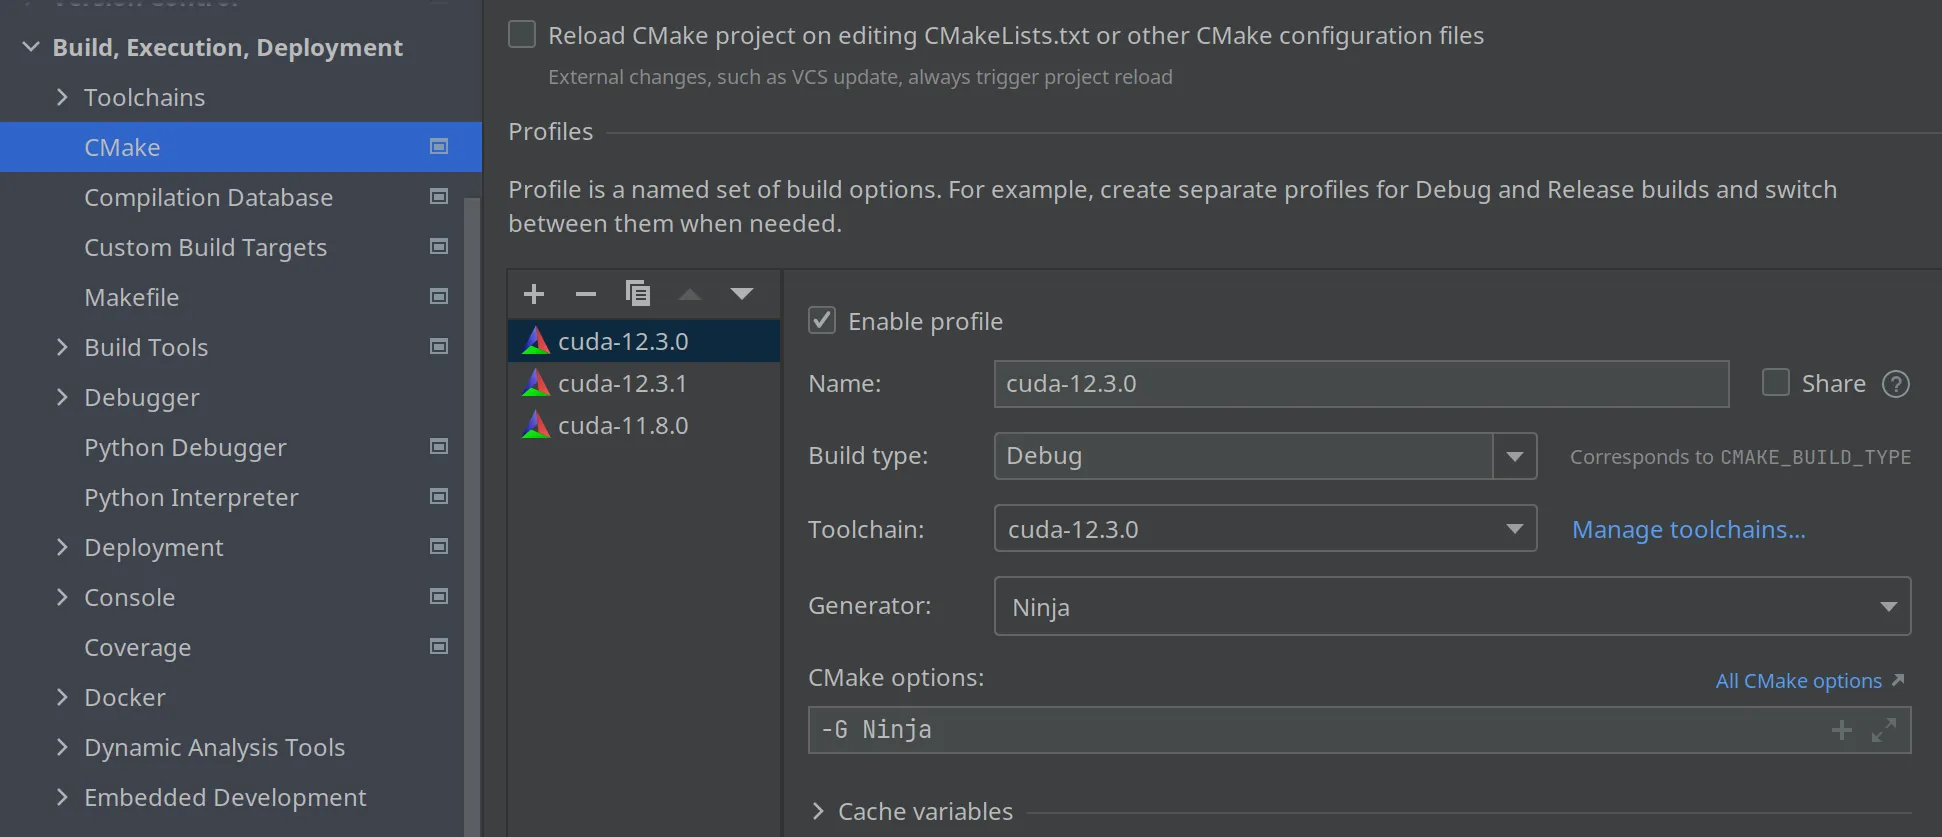
You add a toolchain for every environment you want to use. Once you defined the toolchains, you need to create a Debug|Release configuration based on each toolchain, like here
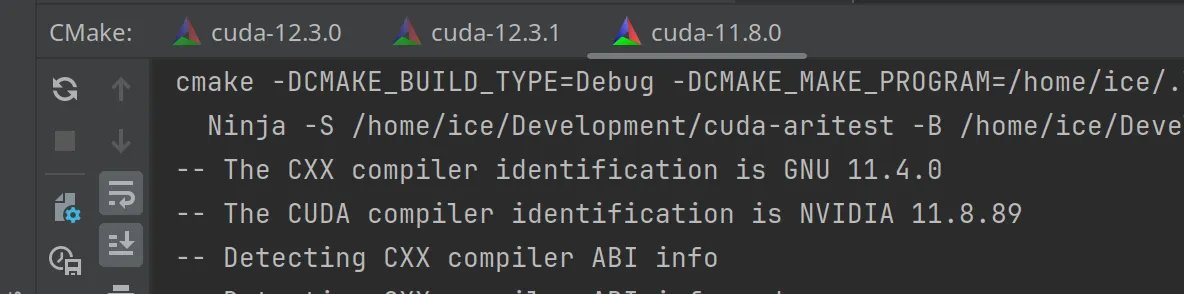
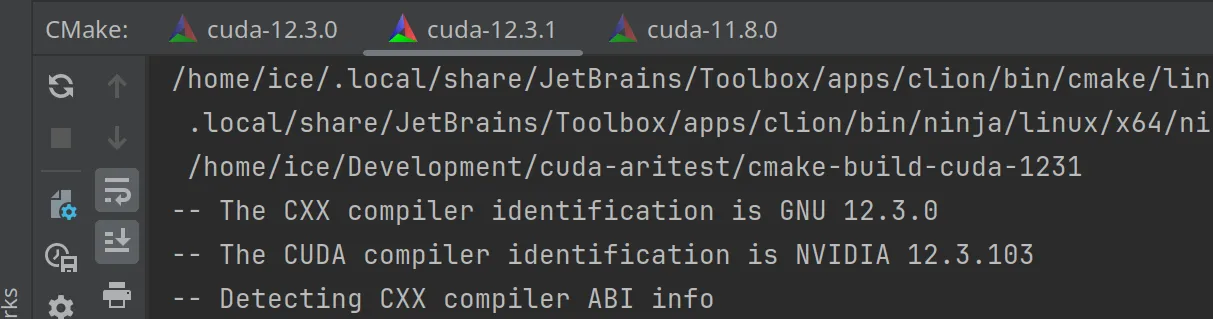
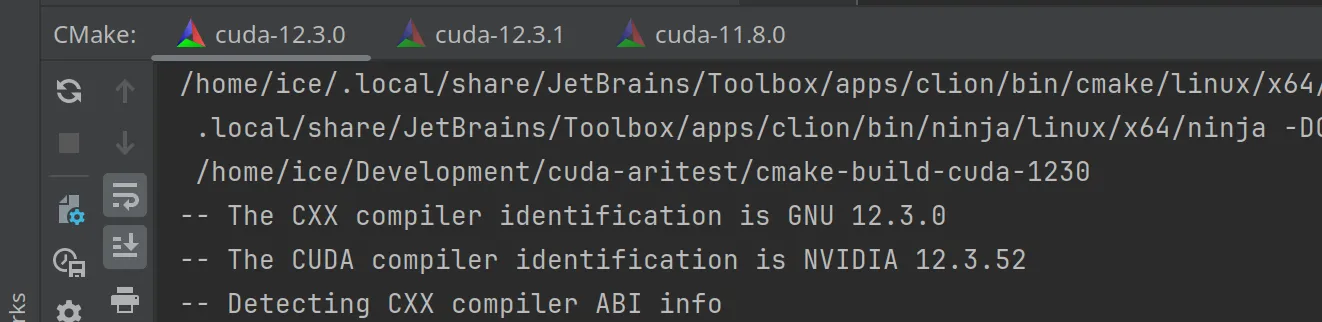
Now when you set up your project, three configurations will be used, as I can show with these three screenshots
Troubleshooting
The amount of things that can go wrong is huge :-) For example, for the cuda sdk 11.8.0, I found that the libcudadevrt.a from the conda channel was not the correct one (at least for the version of the Nvidia drivers I had) so I had to take that library from the Nvidia sdk distribution and copy to my environment, like this
1cp nvidia-cuda-11.8/libcudadevrt.a /home/ice/micromamba/envs/cuda-11.8.0/libThe nice thing is that I am not messing with my system libraries, just with a local conda environment.
Well, I hope it helps.